Pattern of a toy-pillow (cat) for travel
Pillows in the form of beasts are sewed from a wide variety of materials. In fact, any pieces of fabric available in the farm are suitable. Even from small patches you can create a toy in patchwork technique.
Patterns of pillow toys are very simple. They can be drawn on their own based on their own preferences and desired dimensions of the product. This does not require special knowledge of cutting or drawing skills.
How to make a pillow-pillow pattern?
First you need to come up with a design and chooseform of the future product. For beginners, it is better to limit the basic geometric shapes and create an animal from them, for example a cat, as in the image below.

As you can see, details of the pattern of toys-pillows(cats) will be elementary, and additional explanations of the process of cutting and sewing will not be required. Further on in the article there will be given a master class on making a more complicated version of a cushion-cat for traveling.
Pattern details
Who flew airplanes, knows how uncomfortable the armchairs areeconomy class. In airport stores, there are always on sale special cushions in the form of bagels, which are put on the neck for a comfortable sleep in the cabin of the aircraft. Often they are made in the form of little animals. Construct such a pattern of pillow toys - it's 5 minutes, but it will bring a lot of joy to the child, will remind you of the house in a long way and will allow you to relax in comfort.

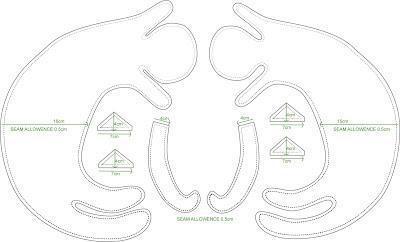
The details on the left are absolutely identical to the details on the right,but for clarity of the sewing process the toy will be cut from two pieces of different fabric. Pattern must be cut out of paper or special tracing paper. Allowances on the edges of parts, if desired, can be done more.
Choosing a fabric for a cat
Material for homemade toys can serve as any scraps and remains of tissue. Even a toy made of chintz, due to handmade work, will look unusual and stylish.

When creating a pattern of children's pillows-toysit is necessary to think in advance the combination of patterns and textures, used fabrics. Preference should be given to bright, natural and soft materials. As a filler, it is better to use sintepon and other artificial fillers that do not cause an allergic reaction in children.
How to sew a toy-pillow (cat) for a child?
The pattern details are laid out on the cuts of the fabric andcircled in sartorial chalk or pencil. Lines should be clear and accurate. According to the cut, the cat will have a multi-colored trunk and ears. It is necessary to apply and the contours of the allowances, for greater convenience in work.


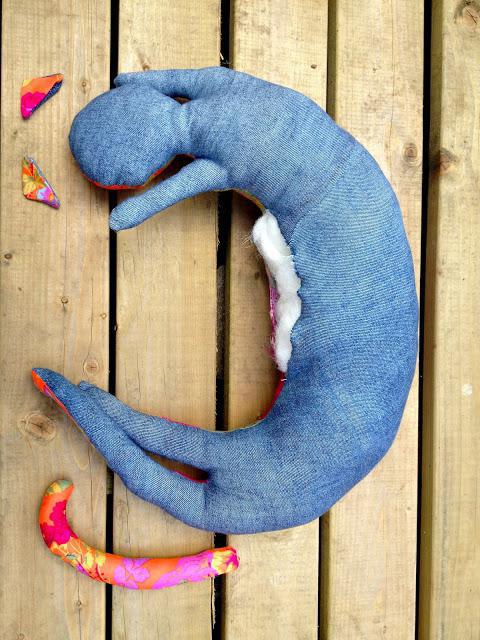
Torso and tail are turned to the frontand fill with sintepon or cotton wool. Stuffing the trunk should begin with the paws and head. For convenience, you may need a long stick or pencil. Then, the seams are neatly terminated manually from the front side. It is necessary to try to make stitches as inconspicuous as possible. The ears should not be filled, but simply turned.

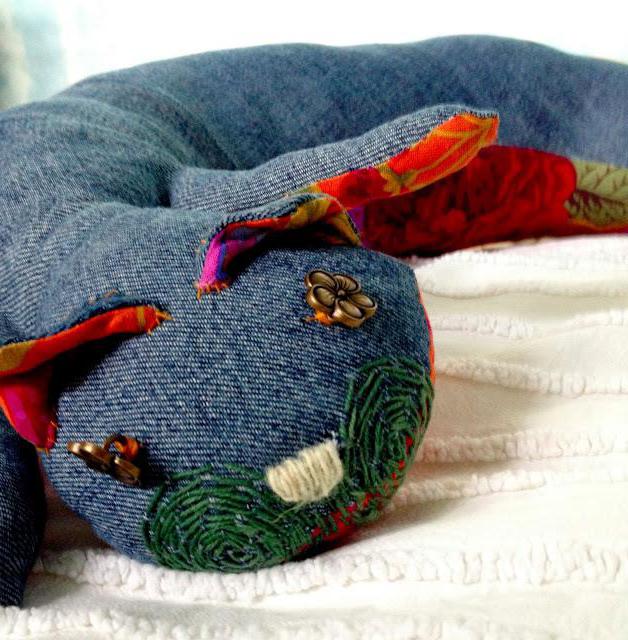
Then you can sew the ears and tail of the toy. At this stage, it is not necessary to make seams unnoticeable. A little "slovenly" seam will give the cat a special charm and point to the manual execution of the toy. On the belly of the cat you can embroider the name of the child or attach a small label with the address of the home address and phone number of the parents.

To the cat's eyes were like factory toys,you need to buy special beads in the store for needlework. If you can not find these, the buttons will be an excellent substitute. The nose, cheeks and mouth can be easily embroidered with colored threads or painted with special tissue markers.
</ p>


