How to weave bracelets from elastic bands on a fork for beginners
If you have already tried to weave jewelry onfingers, but have not yet bought a machine, use a regular fork. If you take the plastic and remove the middle teeth, there will be an alternative to the slingshot. On four denticles the drawing turns out more dense and accurate. Do not know how to weave bracelets of rubber bands on the fork? Read the tips and step-by-step instructions below.

What will be required
Before learning how to weave bracelets from rubber bands on a fork, prepare everything you need to avoid distraction during work. Take the following:
- Rubber bands of different colors (or one).
- Plastic or metal plug (one or two).

- Hook or toothpick for grasping rubber.
- Clasp-clips for connecting the bracelets to the ring.
How to weave bracelets from rubber bands on a fork
For the first experience, use thesingle color. Having mastered the technology of weaving, you will easily alternate shades, getting a rainbow bracelet or any other combination of two, three, etc. rows. shades.

To weave a tight wide bracelet, work this way:
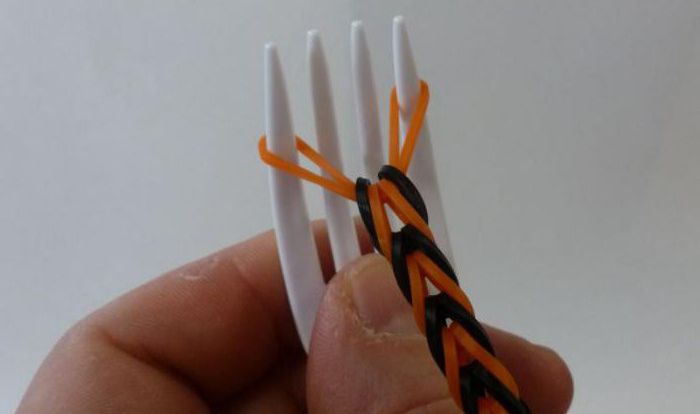
- Take the first rubber band and fold it in half, and then, twisting it in the form of a figure eight, put on two middle teeth.
- Take one more rubber and the same method (folding twice and twisting the figure-eight), put on the two leftmost teeth.
- Repeat the previous step with only two right denticles.
- Spread the bottom double rubber band on the middledenticles through the top of the fork from themselves. As a result, all the double loops will be arranged in a row. If there is no hook, you can use a toothpick to remove the rubber bands. The thin tip of a small wooden stick is much more convenient to pick up tiny tight rings than fingers.
- Put on the next, folded rubber, but without twisting to the middle teeth.
- Re-insert the lower double loops on the middle teeth through the top of the fork.
- Put on the folded rubber band without twisting to the last two denticles on the left, and then also to the right.
- Throw off the bottom double loops from all the prongs back.
- Then the sequence repeats: one rubber - on the middle, take off the lower loops, one - at the extreme, you throw off all the denticles, that is, the steps from # 5 to # 8 to the desired length of the bracelet.

How to finish the weaving
You learned how to make a bracelet of elastic bands onone plug. A dense smooth and neat pattern is important to properly fix, so that the resulting strip of rubber is conveniently worn on the wrist. Finish the product as follows:
- When the fork is left with four double hinges located in one row, swing the outer hinges on the middle teeth.
- Pull the bottom tabs back.
- Put one double rubber on the middle teeth again, without twisting.
- Pull the bottom tabs back.
- Transfer the remaining two loops to one tooth (right to left or vice versa).
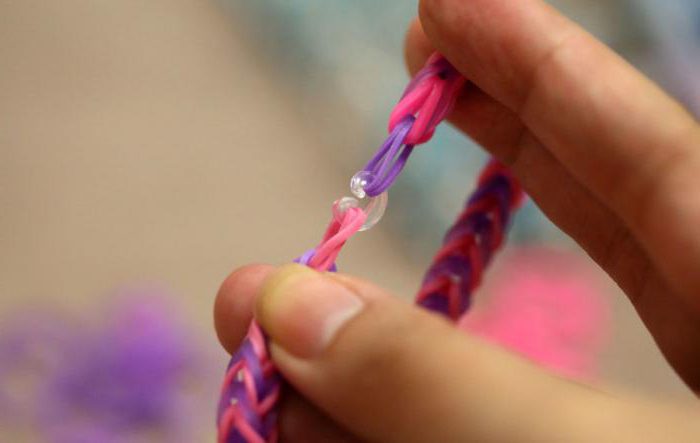
- Take the clasp and neatly transferformed a pair of double loops on one horn of the fastener. If this does not work at once, transfer them first to the hook or toothpick, if there is no hook, and already with this tool on the clasp.
- The second horn of the fastener hook on the first loop of the weave, which was placed in the middle in the form of a figure eight.
Everything, the bracelet has closed in a ring. You can try it on.
How to make bracelets of rubber bands on two forks
The next method is also quite simple, but lessIt is convenient, since the rubber bands will be used not doubled, but single. They are easier to poddevat, but you have to constantly pull the weave back, aligning the structure. The drawing that will be executed resembles a grid or chain mail. Usually done on the machine. If you have not already purchased this tool, use two forks. How to weave bracelet from elastic bands "Scale of the Dragon" on this self-made machine, you will learn further. Forks need to be connected to each other by a rubber band or fixed firmly in any base so that 8 denticles go in sequence.
Operation scheme on two forks
Weaving the "Scale of the Dragon" is as follows:
- Take the first rubber and, having formed from it the figure eight, put on the first and second denticle on the left.
- Also arrange one rubber band on the next pair of teeth of both forks.
- In the next step, don not crossedrubber bands on the middle teeth of each fork and a couple of those that are in the middle of the whole design, that is to the right of the left fork and to the left of the right fork.
- Throw the lower rubber bands through the top back on each of the denticles, where two rows of loops are placed (those denticles that were involved in the previous step).
- Similarly to the first row, but without crossing the eights, put on the rubber string in sequence on pairs of denticles, starting from the left edge.
- Pull the lower tabs back through the top on each tooth.
- Repeat the sequence of steps from # 3 to # 6 to the desired length.

How to fasten the bracelet
Learn how to make a bracelet of rubber bands on two forks, it was not difficult. To complete the weaving, work like this:
- Put one rubber on each fork, bypassing each denticle, that is, each rubber will be twisted as a double eight in succession on four denticles.
- Pull the bottom tabs off each tooth back.
- Pull the weave.
- Pull the outer stitches on each of the forks onto the middle teeth. On the middle teeth of both forks you had a pair of loops.
- Put on the fasteners. Since the bracelet is wide, they will need four. Remove the eyelets from each denticle on the hinge clip.
- The second horn of each clip is fastened in the corresponding stitches at the beginning of the weaving.
You can try on a product.
Now you know how to weave bracelets of rubber bands on the fork. Use ready-made schemes or come up with your own options. Create original ornaments from Rainbow Loom Bands.
</ p>


