Secret thoughts and experiences? Only in a personal diary, made with my own hands
Every person has personalpreferences for the design of their records. Some people like to write down their thoughts in a diary, others simply into a general notebook, and young girls often use beautiful notebooks for this. Today we will try to make a personal diary with our own hands. After all, a thing made with one's own hand carries a positive charge. And if there was a desire to start a personal diary, then it was the case to try to make a suitable notebook for these purposes with your own hands.

Getting Started
So, make a personal diary yourself. Of course, this format, which will be offered today, is more suitable for young girls, but sometimes the love for bright colors does not pass even with age. It's not that easy to make such a notebook qualitatively.
Stage One
Choose for your taste a colorful and whitePaper, cardboard, scrapbooking paper and colored paper in a cage. Even envelopes in which it will be possible to save important and dear to the heart of a note, and also other pleasant trifles are also useful. Bright pages from fashion magazines can be used to place memorable photos on them, movie tickets that left a pleasant memory, etc. You can also paste photos of memorable meetings, parties or favorite friends in your personal diary yourself.
Stage Two
Now we make pages of our future notebook. It will be more interesting if some of them are slightly smaller than the standard size of a notebook. If the farm has a hole punch or figured scissors, it is interesting to process the edges of some pages. Having received a bright pile of paper, we proceed to the next stage.

Stage three and four
Next, lay out the colored pages so that the colors alternate. The main part of the notebook is almost ready.
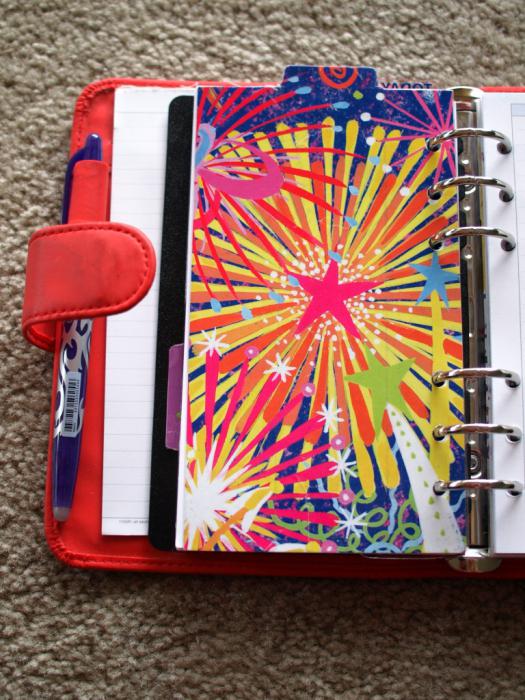
A personal diary, created by oneself, shouldhave an unusually beautiful cover. A simple option is simply to use colored cardboard of your favorite color. And if you complicate it, you can create a felt cover. To do this, we take a piece of felt, a piece of cardboard, a stiffer paper for the formation of fly-leaves and quick-drying adhesive for fabric and paper. From the cardboard you need to cut out two covers, which are 1 cm larger than the main block of the future diary. The felt cover is cut out with allowances of 1 cm at each edge. The edges of the felt cover are greased with glue and, having tucked them, glue to the cardboard. For additional decor and durability we spend the edges of the cover with a colored thread. More dense paper for the decoration of the leaflet
Stage Five
We decorate the cover. Everything is useful: buttons, pictures, beads, ribbons, flowers, as well as fantasy. The next step will be to fasten the diary. For this fit split rings or decorative band. Finally, a colorful personal diary, with my own hands and my own efforts made, ready!
In conclusion
You can decorate your diary in thefilling. Depending on the mood and thoughts that will be contained inside the notebook, its internal design will also vary. Having made a personal diary with your own hands, you will understand how much more pleasant it is to write down thoughts and experiences on the pages of a notebook that emits positive energy!
</ p>